Powered by Blogger.
  • Home
  • Recipes
    • Baking Recipes
    • Dinners
    • Holidays
  • Product Reviews
youtube facebook Pinterest google twitter instagram

Kimberly's Gluten-Free Kitchen

One of my husband's hobby's is to garden.  He loves to garden and he especially loves fruit trees. Our backyard is full of fruit trees. Pretty much anything you can think of, we have at least one of them.  We have peaches, nectarines, plums, pluots, apricots, nectaplums, apples, oranges, limes, lemons and so much more.  It seems like every time he has a day of from work, he is outside planting something else in the backyard.  While most of the time it drives me crazy, in summer I am reaping the rewards when everything starts to ripen.  We have had so much fruit this year, we seriously don't know what to do with ourselves.  Southern California had a lot of rain this year and because of that we got almost double the amount of fruit that we had last year. I have been wracking my brain to come up with ways to use all of it before it goes bad.

I was at my sister's house and she made some muffins that looked absolutely amazing.  She also had a lot of fruit this year and had tons of plums that she didn't want to go to waste so she made some plum, oatmeal muffins.  Now, she is not gluten free and the muffins that she made were not gluten free as well so I couldn't try them.  My husband was happy to taste them for me and he said they were so good and that I needed to go home and make them. I agreed with him and went home to come up with a recipe that would be gluten free and equally good.
I was so happy with the way these muffins came out.  They tasted amazing and were packed full of that amazing plum flavor.  They were hearty without being too much.  They were definitely filling and everyone gobbled them up as soon as they were cool enough to eat.  I was also super happy that they were super easy to make and came out perfect the very first time I made them.  These would be great to make and then freeze.  They would taste amazing over the next year to pull a few out and enjoy some summer flavors during the cold winter months.
The other thing that I loved about these muffins was that I had all the ingredients in my pantry.  I didn't need to go out and search for other ingredients.  I don't eat a whole lot of oats but I usually always have gluten free oats in my pantry if I feel like oatmeal.  I try not to eat a lot of them but having them every once in a while is fine for me.  Just make sure that you use certified gluten free oats.  DO NOT USE REGULAR OATS!!!  They are not gluten free and will make you sick.  I can usually find gluten free oats at any grocery store or Wal-Mart.  I use the Bob's Red Mill Gluten Free Oats and I have never had any problems with them so I recommend using those if you can find them.
I highly recommend this recipe, especially if you are in the same bind that I am with fruit coming out your ears! It is a great way to use up fruit and enjoy some delicious muffins at the same time.  They truly are delicious and you need to give them a try.  Check out the video down below to see exactly how I made them and make sure to check out more recipes on my blog!

Yield: 24 muffins
Author: Kimberly Llewellyn
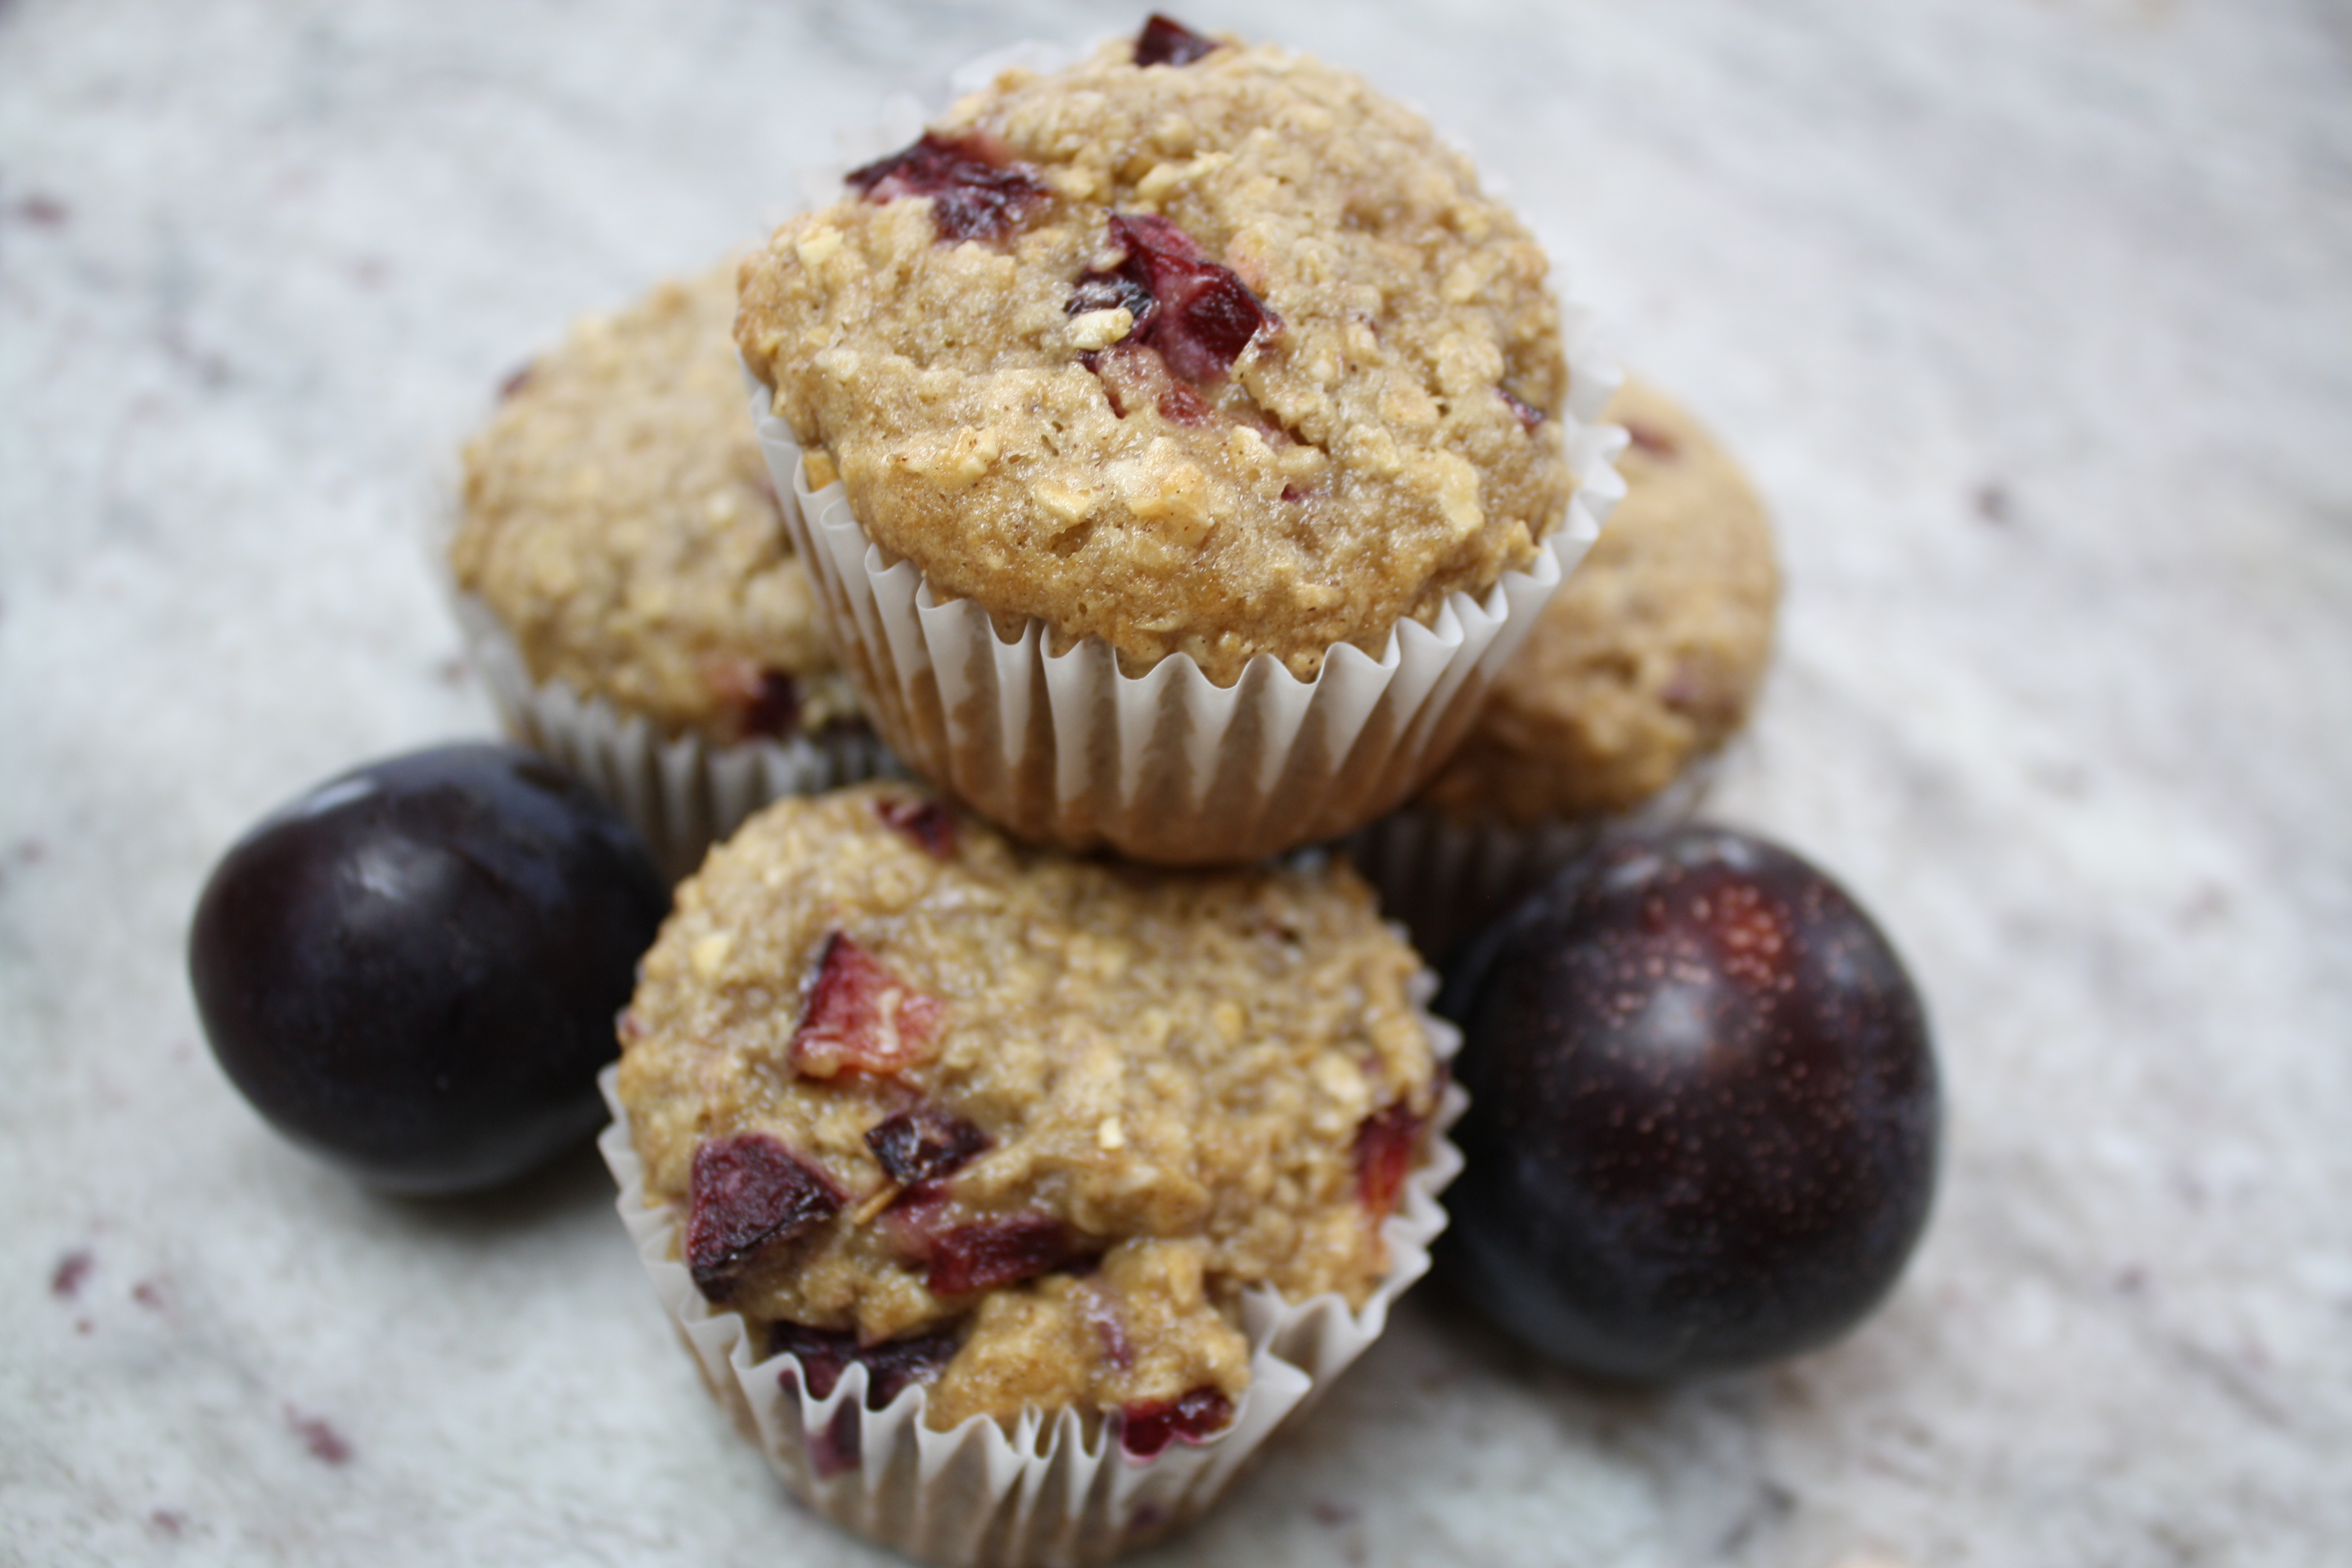
Gluten Free Plum Oatmeal Muffins

These gluten free plum oatmeal muffins are packed full of fresh plums and healthy oats. They are so delicious and you won't be able to get enough!
prep time: 30 Mcook time: 25 Mtotal time: 55 M

ingredients:

  • 2 cups gluten free 1 to 1 flour blend
  • 1 tablespoon baking powder
  • 3 cups gluten free rolled or quick cooking oats
  • 2 teaspoons cinnamon
  • 2 cups brown sugar
  • 8-12 large plums, pitted and chopped into small pieces
  • 1 cup melted butter
  • 2 eggs
  • 1/2 cup milk
  • 2 teaspoons pure vanilla extract

instructions:

How to cook Gluten Free Plum Oatmeal Muffins

  1. Preheat oven to 350 degrees F. and line 24 muffin pans with liners.
  2. Combine gluten free flour, baking powder, oats, cinnamon, and brown sugar in a large mixing bowl and stir to combine. Break up any lumps.
  3. Add chopped plums and stir to combine.
  4. Add butter, eggs, vanilla, and milk. Mix all the ingredients together until just combined.
  5. Divide mixture evenly between the muffins pan wells, filling them about 3/4 full. Bake for 25 minutes or until a toothpick inserted into the middle comes out clean.
  6. Allow a few minutes to cool before transferring them to a wire rack to cool completely.
Created using The Recipes Generator
August 09, 2019 No comments
So I am a pretty healthy eater. I know it might not look that way when you go through all the recipes on my blog but in general I eat pretty healthy, only enjoying a dessert every once in a while.  I don't really ever fry anything or eat fried foods. Now, while saying all of that there are times in your life when you need to indulge and indulge I mean eat donuts. Everyone needs a donut once in a while and I am not talking about the dry, crumbly, gluten free donuts that you can find in the freezer section. I am talking about a real donut right out of the fryer.  If you are like me and need to indulge every once in a while, this is the recipe for you.

These are a yeast donut and so they are fluffy and melt in your mouth delicious.  I have tried making donuts a few times in my life and let me tell you, I have not been successful in all of those attempts but I nailed it with this recipe.  I think I was trying to rush it and these donuts need time.  I was so eager to eat the donut that I did not give them adequate time to rest and rise.  Well patience is definitely a virtue with these donuts.  While this recipe is not hard at all and one of my easier dough's to manipulate, there is a lot of waiting time. There needs to be plenty of time for that melted butter to harden up and then to give them time to rise so they are fluffy and not dense. The cooking time is super fast though! The flour that I used in these is Bob's Red Mill Gluten Free 1 to 1 Baking Flour. Any 1 to 1 baking flour should work for these, just make sure xantham gum is included in the mix. If not you will need to add some.
The first time I gave my husband a bite of one of these, he described it as heaven. He is also not gluten free I may add and my kids were over the moon.  Now, you might have been like me and not had a warm, delicious donut in years and might feel the need to go a bit crazy when eating these but pace yourself.  There is a lot of butter in these and I can tell you from experience, if you shove multiple in your mouth in a short amount of time your will get a stomach ache but it was kind of worth it!
These are best eaten warm as soon as they are made but if you have left overs, just keep them in a airtight container and just warm them up in the microwave for a few seconds to get them warm and fluffy again.  They also freeze really well and just defrost on the counter or in the microwave. There is a video down below that shows exactly how I made them and make sure to check out my YouTube Channel for more great recipes and product reviews.


Yield: about 2 dozen donutsAuthor: Kimberly LlewellynPin it

Gluten Free Donuts

The best gluten free yeast glazed donut recipe around!
prep time: 8 hour and 30 MINScook time: 5 MINStotal time: 8 hours and 35 mins

ingredients:

Donuts
  • 1-1/8 cup whole milk, warm
  • 1/4 cup sugar
  • 1 package Instant or Active dry yeast (2-1/4 teaspoons)
  • 2 large eggs, slightly beaten
  • 3/4 cup melted butter
  • 4 cups gluten free flour blend (I used Bob's Red Mill Gluten Free 1 to 1 Flour Blend)
  • 1/2 teaspoon salt
  • shortening/oil for frying
Glaze
  • 4 tablespoons melted butter
  • 1 teaspoon vanilla
  • 3 cups powdered sugar
  • 1/2 cup milk (more or less)

instructions

Dough
  1. Warm the milk to about 105 degrees. Add the milk to the large mixing bowl of your stand mixer. Add sugar and stir to dissolve. Add the yeast and stir to combine.  Let yeast mixture rest for about 5 minutes.
  2. Add the beaten eggs and melted butter to yeast mixture and stir to combine.
  3. While mixer is on low, slowly add the gluten free flour and salt. Mix until the dough comes together. Turn the mixer up to medium/high and beat for about 2 minutes. Turn off mixer and let dough rest in bowl for about 10 minutes.
  4. After dough has rested, pour it into a lightly oiled bowl and cover with plastic wrap. Refrigerate dough for at least 8 hours or overnight.
To Form the Donuts
  1. Remove the dough from the refrigerator and roll it out on a lightly floured surface with gluten free flour until it is 1/2 to 1/3 inch thick. Use a 3 inch donut cutter or a biscuit cutter to cut donuts out. You can use the large side of a piping tool to cut out the middle if you do not have a donut cutter.
  2. Place the cut donuts and holes onto a parchment paper lined baking sheet and repeat with remaining dough.
  3. Cover the donuts and let rise for about one hour.
Fry the Donuts
  1. Heat a few inches of oil or shortening in  a large cast iron skillet or dutch oven over medium heat until the oil reaches about 350 to 375 degrees (make sure you use a thermometer). Carefully add the donuts to the hot oil and fry until golden brown, about 1 minute per side. (The donut holes will only take about 30 seconds per side)
  2. Use a slotted spoon or spatula to remove the donuts from the oil and place them on a paper towel lined baking sheet to absorb excess oil. Let them cool slightly and then dip donuts in the glaze.
Glaze
  1. Combine sugar, melted butter, milk and vanilla in a medium sized bowl and mix until smooth. Add just enough milk to make a think icing.
  2. Once donuts are dipped halfway into the icing, take them out and turn them icing side up onto a cooling rack set inside a baking sheet to catch the drips.

notes

Eating these donuts hot and right out of the fryer is a must. If you save them for the next day, pop them in the microwave for a few seconds to heat them up before eating.
Created using The Recipes Generator
February 27, 2018 1 comments
Waking up to the smell of cinnamon rolls in the oven is something that no one should ever be denied. I tried for years to master gluten free cinnamon rolls but I could never get it quite right.  All the recipes that I found had you use muffin tins and that was jut not the same.  I wanted a real cinnamon roll and not a cinnamon muffin.  I couldn't figure out how to roll it up without it turning into a complete disaster.  Gluten free dough can be super sticky and really fragile to work with.  I just could not figure it out until now! I was able to come up with this recipe and with the use of plastic wrap and parchment paper, I was able to tackle these cinnamon rolls.  They are everything that you remember and so much more. There is a disclaimer on this recipe because they are not easy! If you have not worked with gluten free dough before, you might find them extremely difficult to make! Watch the video and prepare yourself and think calm thoughts.

I use Bob's Red Mill 1 to 1 Gluten Free Baking Flour for this recipe and pretty much all my recipes. You could use another 1 to 1 gluten free baking flour in this recipe but I have only used Bob's Red Mill to make them.  They have always turned out great and my family is so happy every time I make them.
Most of the time I make them the day before because trying to make these in time for breakfast is a lot.  Just make them up to the point that you put them into the pie pan and then put them in the refrigerator overnight. Let them sit on the counter in the morning for about 25 minutes before you bake them and they will be perfect.
They are gooey and so delicious. It will be hard to stop at just one.  They are not my easiest recipe though.  They take a little bit of skill because the dough consistency is so much different if you aren't used to working with gluten free dough.  It is so sticky and flimsy so you really want to take you time with this one. If you tried to roll them up without the plastic wrap, I guarantee it would not work well.  They would just fall apart.  The consistency is more like really thick cake batter so you could imagine that rolling that up can be hard.  Just stick with it and keep going. Don't get too frustrated and if it doesn't work the first time, try again! They are so worth it!
Make sure you check out the video down below to see how I roll up the cinnamon rolls so that you can get on your way to making these! Also, check out my YouTube channel for more great recipes and product reviews!
Yield: 8 servingsAuthor: Kimberly Llewellyn

Gluten Free Cinnamon Rolls

Don't miss out on delicious cinnamon rolls any longer! They roll up just like regular cinnamon rolls and have all the flavor that you have been missing!
prep time: 1 hour and 15 minscook time: 22 minstotal time: 1 hours and 37 mins

ingredients:

Dough
  • 2/3 cup warm milk
  • 1 tablespoon melted butter
  • 1 packet yeast
  • 1/4 cup granulated sugar
  • 2 cups gluten free flour blend (I use Bob's Red Mill 1 to 1 Gluten Free Flour Blend)
  • 1/2 teaspoon baking soda
  • 2 1/2 teaspoons baking powder
  • 1/2 teaspoon salt
  • 1 large egg
  • 1/4 cup olive oil
  • 1/2 teaspoon pure vanilla extract
Filling
  • 1/3 cup butter, softened
  • 1/2 cup brown sugar
  • 2 tablespoons cinnamon
Frosting
  • 7 tablespoons butter, softened
  • 2 ounces cream cheese
  • 1/2 teaspoon pure vanilla extract
  • 2 tablespoons milk
  • 1 1/2 cups powdered sugar, sifted
  • 1/4 teaspoon salt

instructions

Dough:
  1. Combine yeast and sugar in a medium sized bowl. Combine warm milk and melted butter together and whisk into yeast mixture. Set aside to proof.
  2. In mixer add gluten free flour, baking powder, baking soda and salt. Mix until combined.
  3. Once yeast is proofed add egg, oil and vanilla. Whisk together and then slowly add to flour mixture. Turn mixer up and beat for 1 1/2 minutes.
  4. Roll out dough using plastic wrap on the bottom and parchment paper on top.
Filling:
  1. Spread butter over dough.
  2. Combine brown sugar and cinnamon in small bowl and then sprinkle over dough.
  3. Roll dough using the plastic wrap to help. Dip knife into gluten free  flour and then cut into 8 pieces. 
  4. Place rolls side by side in greased and floured pie pan. Cover and let rise for at least 15 minutes.
  5. Bake in preheated 350 degree oven for 22-27 minutes until the tops are golden brown.
Icing:
  1. Beat butter and cream cheese until creamy. Mix in vanilla and milk, then gradually mix in the powdered sugar and salt until smooth and fluffy.  Spread over cinnamon rolls as soon as they come out of the oven.

NOTES:

*Night before prep. Once rolls are in pie plate, cover with plastic wrap and place in refrigerator. In the morning set them out for at least 25 minutes before baking.
Created using The Recipes Generator

December 06, 2017 7 comments
Older Posts

Gluten Free Websites

  • Gluten Free Resource Directory

About Me

About Me

My name is Kimberly and ever since my diagnosis about 12 years ago, I have been on a mission to find great gluten free products and develop amazing recipes that everyone will love.

Follow Me

Awards

Gluten Free Youtube Channels

Popular Posts

  • Gluten Free Sugar Cookies with Royal Icing
    Sugar cookies are a must in my house during Christmas.  My kids look forward all year until they get to help me make the sugar cookies and t...
  • Gluten Free Christmas Pinwheel Cookies
    Christmas is a time for treats, treats and treats! We seem to overindulge during this holiday season and just because you are gluten free, i...
  • Gluten Free Cinnamon Rolls
    Waking up to the smell of cinnamon rolls in the oven is something that no one should ever be denied. I tried for years to master gluten free...

recent posts

Labels

Appetizers Baking Recipes breakfast Cakes Christmas Cookies Cooking Recipes Dinners Pie product reveiws Pumpkin Videos

1

Report Abuse

FOLLOW ME @INSTAGRAM

Created with by ThemeXpose