Powered by Blogger.
  • Home
  • Recipes
    • Baking Recipes
    • Dinners
    • Holidays
  • Product Reviews
youtube facebook Pinterest google twitter instagram

Kimberly's Gluten-Free Kitchen

It has been so long since I have last posted. Things have been crazy in my life and I haven't had any time to bake or create any new content. I started nursing school in August and that has taken over my life! So many people told me how hard it would be and they weren't lying! I am on a break in between semesters so I thought that it would be perfect time to create a new post. My sister's birthday is in December and I have been wanting to make her something special for her birthday this year. I decided to make a extra fun cake that had a raspberry filling. I love raspberries and thought this would make the perfect filling for an extra yummy birthday cake. I was so happy that I did because the cake turned out amazing and this cake filling made all the difference.
Since I live in Southern California, we are able to get fresh raspberries in the middle of December. I even tried to find frozen raspberries but after two stores, I couldn't find any so I went with fresh. This recipe would work great with frozen raspberries and using fresh worked perfect as well. If you are using fresh, make sure to wash them really well and remove any leaves that are still in them. I also love adding the lemon juice and zest to this filling. I think it really balances the flavor and adds a little punch to this making it a little more tart which is just what you want for a cake filling to balance out the sweetness of the frosting.  
After you have cooked down the raspberries with the sugar you are really going to want to strain it. There is so much more pulp and seeds than you think there will be and you will want a smooth filling for your cake. The seeds and pulp will take away from the texture that you want and so I would really encourage you to not skip this step. I believe that it is one of the most important to get the filling that you want for your cake. When you are straining it, you will also need to use some force to get all the juice through the strainer. Use that spatula and really push it through the strainer until all you are left is the seedy pulp. There shouldn't be any liquid left in the strainer.

Next, you will want to add that cornstarch slurry to the filling. Adding the water to the cornstarch before adding it to the filling is very important so that you don't get clumps of cornstarch in your filling. No one wants to find a ball of cornstarch in their piece of cake so make sure you make that slurry before adding it to the filling. This will ensure a perfect, smooth consistency.  Also, if you have ever made a cake with a filling and had it ooze out between the layers, you will know why adding cornstarch is so important. You will really want to thicken this up so that is doesn't ooze out and make a mess everywhere. Speaking from someone who has had this happen to them, it is so annoying and frustrating. Adding the cornstarch will make it nice a thick so that you won't have a disaster on your hands!
Once you add the cornstarch and put it back on the heat, it will thicken up nicely. Just continue to stir the mixture while it is thickening up so that it doesn't burn on the bottom. After it is nice a thick, just remove it from the heat and place it in a glass bowl. I like to make my fillings a few days before I make my cake because it really allows those flavors to come together. It also gets nice a cool and thick which makes it much easier to assemble your cake. 
Once your filling is nice a cool you can pipe or spread it between the layers. It will hold it's shape and not ooze out the sides. I do add a layer of frosting around the edges of the filling when I fill my cakes but that is really just overboard for this filling. After the oozing nightmare that I experienced, I am extra cautious when it comes to filling a cake but with this filling, it is not even necessary! This filling will definitely take your cake to the next level and everyone will be so impressed with your baking skills. You don't even need to tell them how easy it is to make!
Gluten Free Raspberry Cake Filling

Gluten Free Raspberry Cake Filling

Yield: 1.5 cups
Author: Kimberly Llewellyn
Prep time: 20 MinCook time: 10 Mininactive time: 1 HourTotal time: 1 H & 30 M
This raspberry cake filling is delicious and full of raspberry flavor. It is the perfect consistency so that it doesn't ooze out of your cake and will take your cakes to the next level!

Ingredients

  • 4 cups fresh or frozen raspberries
  • 3/4 cup granulated sugar
  • 1 Tbsp lemon juice
  • 2 tsp lemon zest
  • 1/4 cup water for raspberry mixture
  • 1/4 cup cornstarch
  • 1/4 cup water for cornstarch slurry

Instructions

  1. Place washed fresh or frozen raspberries, sugar, lemon juice, lemon zest and 1/4 cup water into a medium saucepan over medium heat.
  2. Stir to combine and continue stirring until mixture comes to a boil.
  3. Turn down the heat to low and continue to simmer for 10-15 minutes.
  4. Remove from heat and pour mixture into a metal strainer over a medium sized bowl. Push mixture through the strainer using a rubber spatula until liquid has been pushed through and all that is left is the seedy pulp.
  5. Wash and dry saucepan to remove all leftover seeds.
  6. Combine cornstarch and 1/4 cup of water in a separate bowl and stir until cornstarch is fully dissolved. Add to raspberry filling and stir until fully incorporated.
  7. Pour filling into washed out saucepan and put over medium heat while stirring constantly.
  8. Cook until mixture comes to a boil and then reduce heat to low and continue to cook and stir for 2-3 minutes.
  9. Remove from heat and pour filling into a glass bowl and cover with plastic wrap. Place in refrigerator for at least 1 hour but can be stored in fridge for up to a week.
Did you make this recipe?
Tag @kimberlysglutenfreekitchen on instagram and hashtag it #glutenfreeraspberrycakefilling
December 21, 2021 No comments
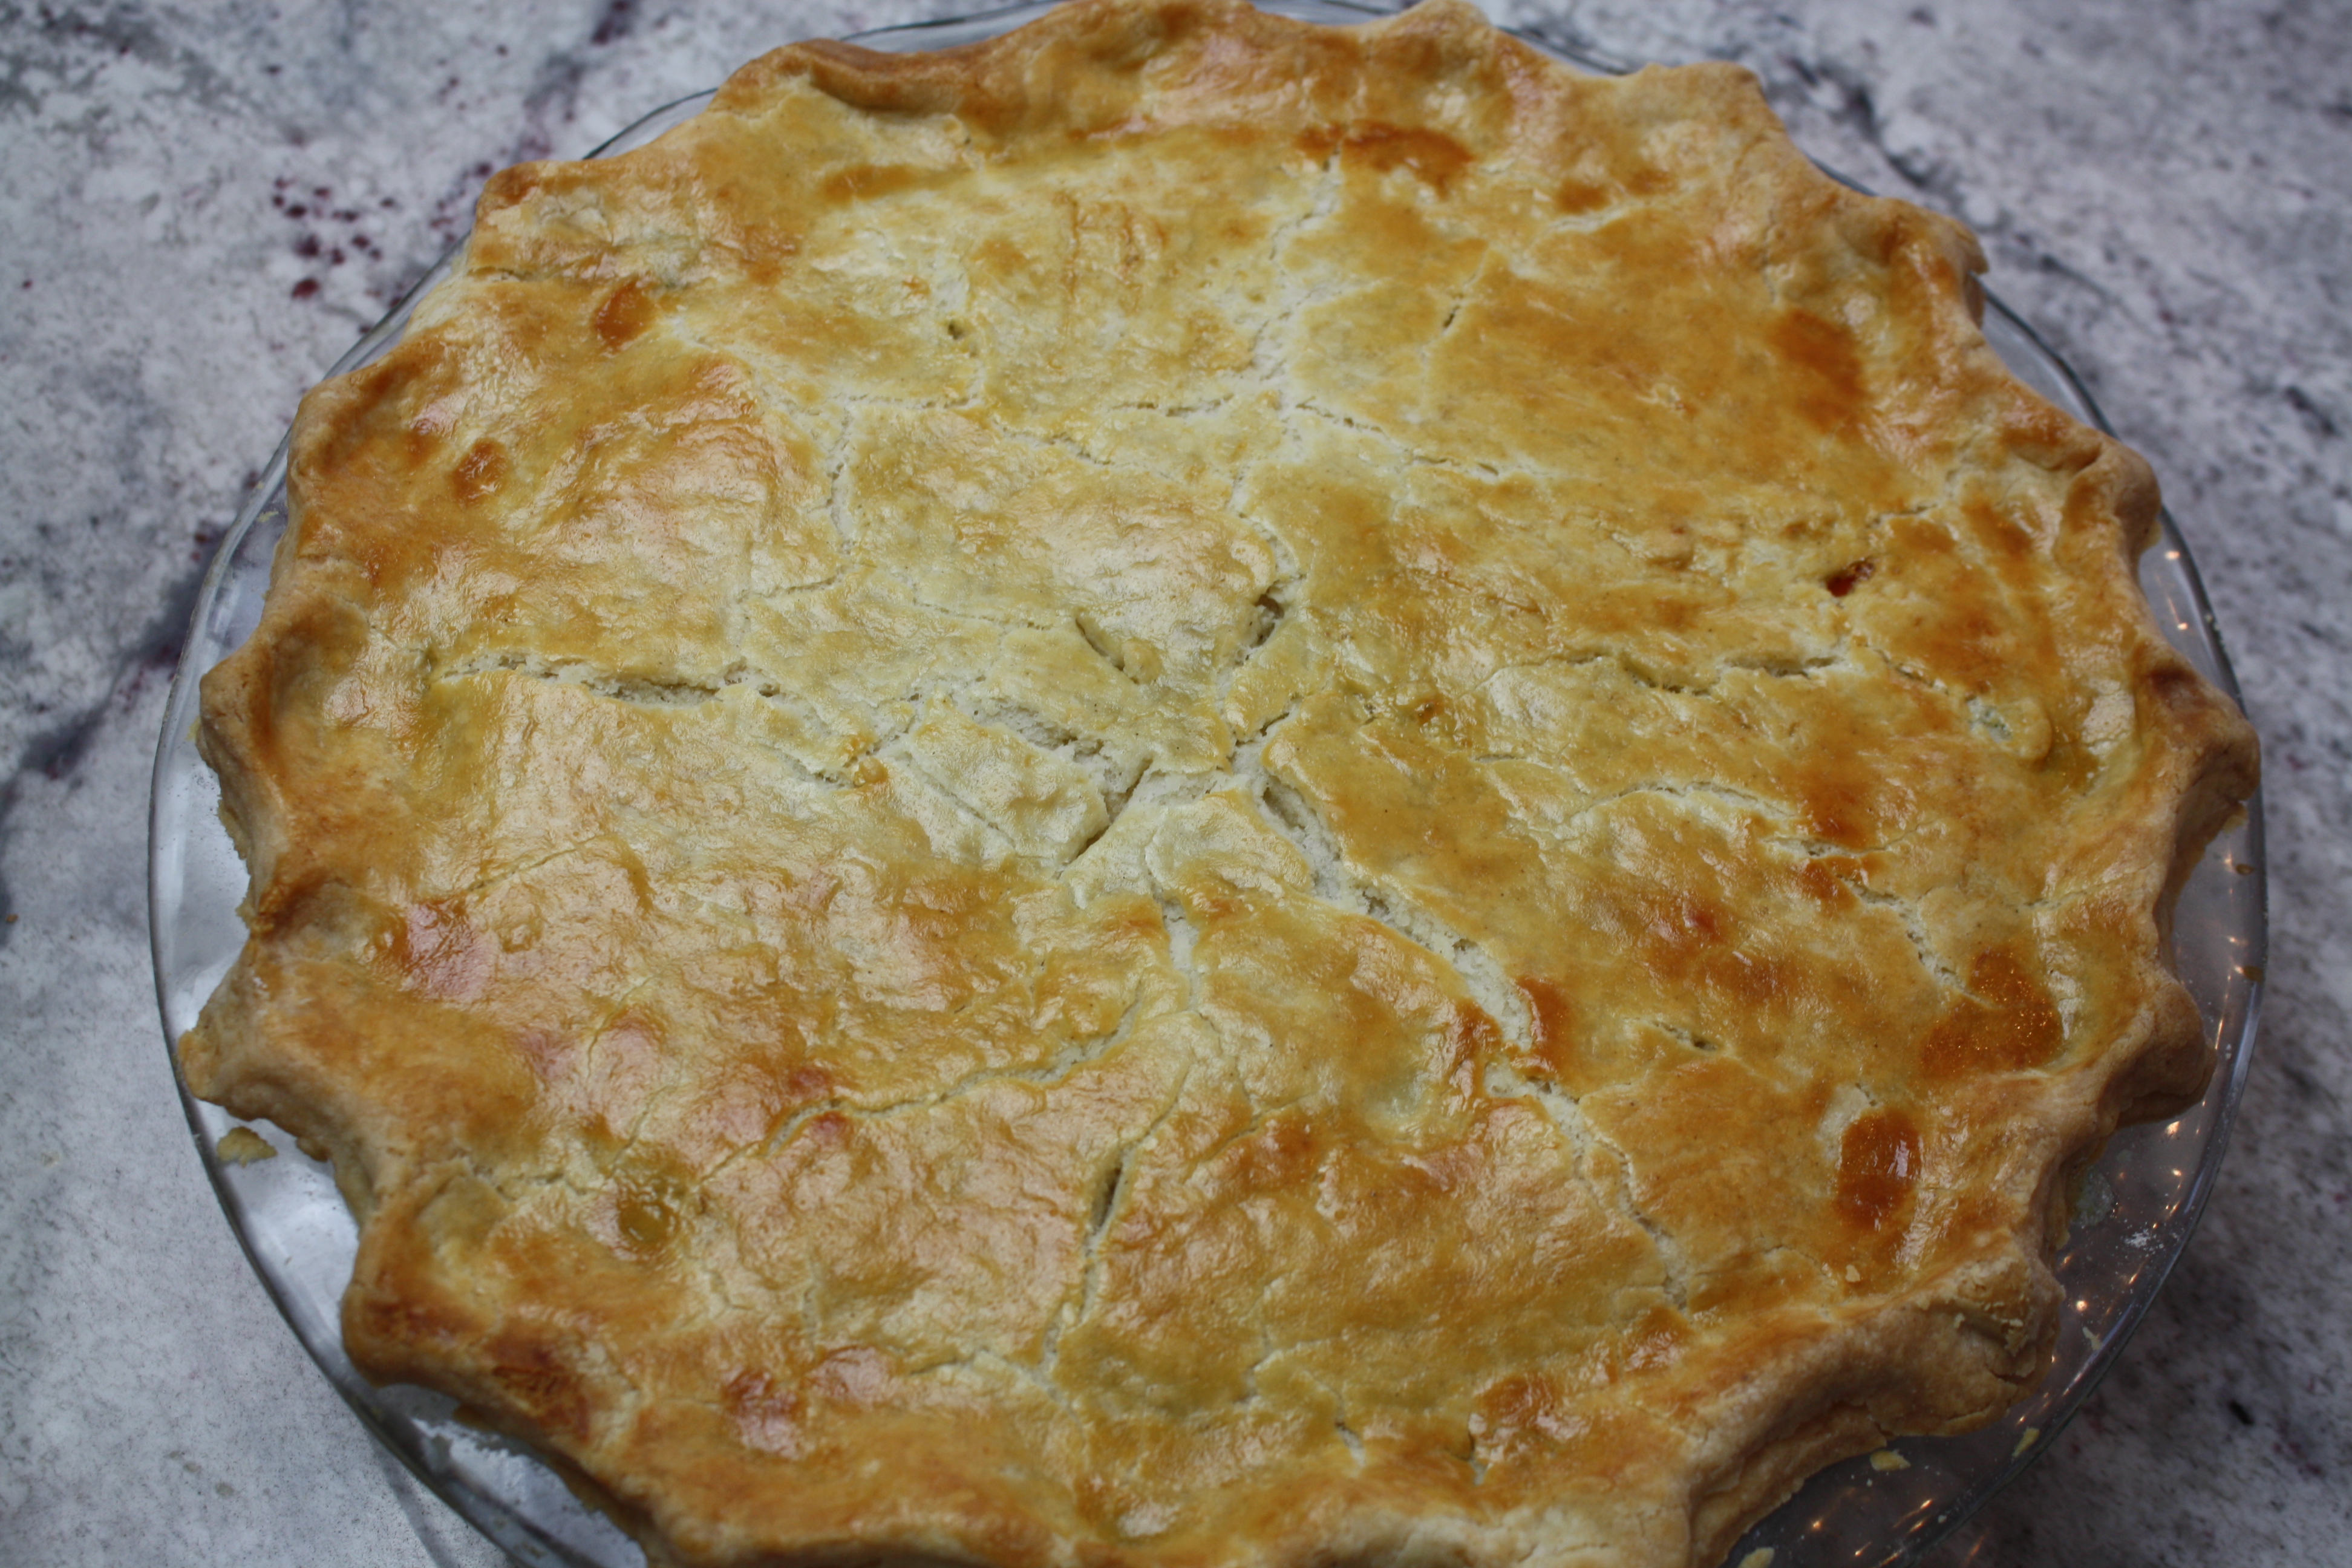
If you were going to make a list with the ultimate comfort foods on it, chicken pot pie would definitely be on that list.  In terms of comfort food, it is just about as comforting as it gets.  There is nothing like walking into your house when one of these savory pies is in the oven.  The delicious smell just hits your nose immediately and your stomach will just start rumbling. I swear, when I just know that I am going to be making one of these, I start salivating. This dish is particularly amazing during those colder months because it will just warm you up from the inside out.  
One of the most important parts of this pie is the crust.  Well really it's the most important part of any pie because if you don't have a good base then the whole thing is just not going to taste right, no matter how good the filling is.  I have spent many years perfecting my pie crust and I have to say that this is an amazing recipe.  It really is the best gluten free pie crust.  It is soft and flaky with the right texture to hold together any of your favorite pies.  It is also workable.  A lot of gluten free baked goods can be hard to work with because they can be more flimsy and fall about a lot easier.  This pie crust holds up pretty well when working with it and it can be pretty forgiving.  I love to use a flimsy, plastic cutting board when I roll out my pie cruse because it just makes it so much easier when transferring it over to the pie plate.  I have tried many different ways and this has worked the best for me.  It took a lot of frustration out of making the pie crust and just brought the fun back into it.  I have made a lot of pie crust over the years and it has worked for me every time.
The filling for this pie is super easy to make, especially when you make it easy on yourself and buy precooked chicken.  I very rarely buy products that are already made but sometimes it is a must to keep yourself sane.  Cooking the chicken just adds another step but you can definitely still do it.  I have thrown some chicken into my Instant Pot and cooked it up and shredded it for lots of different recipes.  It also works great if you have some leftover chicken from the previous night.  Sometimes if I know that I want to make this, I will cook extra chicken one night and then save it for when I want to make this yummy dinner.  It just cuts out a step and will make it easier to whip this pie up.
Using gluten free flour to thicken sauces actually works really well because most of gluten free flour is starch so it is a great thickener.  I never have any trouble when I use Bob's Red Mill Gluten Free 1 to 1 Baking Flour in any of my recipes.  I think it works great and I always get a great result.  The filling thickens up just right when I use this flour and I never have any trouble with it.  You can also use whatever vegetables that you like but peas and carrots are just such a classic and my family loves it this way.
I honestly wish that I could give you all a bite of what this pie tastes like because I know you will be in heaven.  My husband and I actually fight over the leftovers because it is even better the second day.  I will look forward to this all day when I know that I get to eat it for lunch.  It really is that good.  I also highly recommend the egg wash before you put it in the oven because it gives the pie such a nice brown color and shiny finish.  I know you won't be disappointed with this recipe because it is so good.  Check out other great recipes on my blog and my YouTube Channel that you will absolutely love.

Yield: 10 servingsAuthor: Kimberly Llewellyn

Gluten Free Chicken Pot Pie

Don't miss out on chicken pot pie ever again! This recipe is not only tastes amazing but is easy to put together. Any one can make this delicious savory dish that is the ultimate comfort food!
prep time: 40 minscook time: 45 minstotal time: 85 mins

ingredients:

Gluten Free Pie Crust
  • 3 cups gluten free flour blend (I use Bob's  Red Mill Gluten Free 1 to 1 Baking Flour)
  • 2 tablespoons granulated sugar
  • 1 teaspoon kosher salt
  • 1 cup unsalted butter, cubed and cold
  • 1 large egg
  • 2/3 cup buttermilk
Pot Pie Filling
  • 1/4 cup unsalted butter
  • 1/3 cup diced onion
  • 1 cup sliced carrots (about 2 medium carrots)
  • 1/2 cup diced celery
  • 2 cloves minced garlic
  • 1/3 cup gluten free flour blend (I use Bob's Red Mill Gluten Free 1 to 1 Baking Flour)
  • 1 1/2 teaspoons minced fresh thyme
  • 1 tablespoon minced fresh Italian parsley
  • 1 teaspoon salt
  • 1/2 teaspoon black pepper
  • 1 3/4 cups chicken broth
  • 1/2 cup heavy cream
  • 3 cups shredded chicken (I use a rotisserie chicken, just make sure it is gluten free)
  • 1 cup frozen peas

instructions

Make the Pie Crust
  1. Place all the dry ingredients into a mixer and blend together.
  2. Add the cold, cubed, unsalted butter to the flour mixture while the mixer is on low.
  3. Mix until the mixture resembles coarse meal.
  4. Whisk egg and buttermilk together in a small bowl.
  5. Turn mixer on low and slowly pour egg mixture into flour mixture.
  6. Mix dough on low until it forms a ball.
  7. Allow dough to rest in the refrigerator for at least 30 minutes. *You can make the night before and let dough rest overnight.
Make the Pot Pie
  1. Heat butter over medium-high heat in a large skillet. Add the onions, carrots, celery, and garlic and cook until tender, stirring occasionally. 
  2. Whisk in the gluten free flour, salt, black pepper, thyme, parsley, chicken broth, and heavy cream. Whisk until there are no flour lumps and then simmer over medium-low heat  for 10 minutes or until sauce has thickened. 
  3. Stir in shredded chicken and frozen peas. Remove from heat and set aside while you roll out the pie dough.
  4. Preheat oven to 400 degrees F.
  5. Remove dough from the refrigerator.  On a lightly floured plastic cutting board roll out half of the dough and flip over into pie plate. Pat with your fingers, making sure it is smooth. Trim the extra overhang of the dough with a knife and discard. 
  6. Fill the pie plate with the pot pie filling and then roll out the second half of the pie crust. Drape over filled pie plate and seal the edges by crimping with a fork or your fingers. With a knife, slice a few small slits in the center of the top crust.  Using a brush, brush crust and edges with beaten egg.
  7. Bake for 45 minutes, or until crust is golden brown. I sometimes use a pie crust shield or tin foil to protect the edges from browning too soon. Cool for 10 minutes, cute into slices and serve.

NOTES:

This pie works great with a rotisserie chicken or any left over chicken that you may have.  This pie also freezes well. Cool completely and freeze up to 1 month. You can freeze the whole pie or just slices.
Created using The Recipes Generator
March 13, 2019 1 comments
If you are on the gluten free diet, I'm sure that you have heard that a lot of the foods that you used to enjoy are now off limits and places that you used to eat at are no longer safe for you.  While lots of restaurants are not safe to eat at, I refuse to believe that dishes that we used to love are completely off limits.  For a long time, I thought the delicious orange chicken that they have at Panda Express was just something I would never get to enjoy again.  Then, I thought about it and thought why? I could make a version of this myself and it would probably be so much better than the original.  So I made it and I have to tell you that I was right! This recipe is AMAZING!! My husband came in while I was making this and stole a bite. His eyes just got really big and he stared at me in amazement as he finished his bite.  All he could say after was WOW!
 Now, I have to say that this is not the healthiest recipe I have ever made, not by a long shot but it was worth it.  I probably won't be making this dish every week but every once in a while it is fun to splurge and enjoy some yummy food that you once thought you would never be able to have again. I haven't eaten at Panda Express in over a decade but from what I remembered of their chicken, this was way better.
When making this I do have some tips that might make it a bit easier.  Make sure that you don't overfill the pan when frying the chicken.  If too much is put in the pan, the chicken will all stick together and make one large chunk. Make sure to spread them out and also add one piece of chicken at a time.  This is the most time consuming process because you want every piece individually fried. You also want to make sure you cook the chicken long enough to get the outside nice and crispy.  Make sure you leave it in the oil for the full 5-6 min.  If you take it out before that it will end up soggy and the breading will just kind of fall off.  Other than that, the recipe is pretty easy to follow and make.

I hope that you really enjoy this recipe like we all did and might fulfill some of your cravings. Make sure to watch the video down below to see exactly how I made this and check out my YouTube channel for more great recipes and product reviews.
Yield: 8 servingsAuthor: Kimberly Llewellyn

Gluten Free Orange Chicken

Copycat Panda Express orange chicken recipe that tastes even better than the original.
prep time: 20 minscook time: 20 minstotal time: 40 mins

ingredients:

Chicken
  • 2 lbs chicken breast, cubed
  • 1 tablespoon salt
  • 1 teaspoon white pepper
  • 1 cup cornstarch
  • 3 cups gluten free flour blend
  • 1 egg
  • 2 1/2 cups water
  • 2 tablespoons vegetable oil
  • 6 cups oil, for frying
Orange Sauce
  • 1 tablespoon vegetable oil
  • 1/4 teaspoon red chili flakes
  • 1 tablespoon garlic, minced
  • 1/2 teaspoon ginger, minced
  • 1/4 cup sugar
  • 1/4 cup brown sugar
  • 1/4 cup orange juice, fresh or from carton
  • 1/4 cup white distilled vinegar (gluten free)
  • 2 tablespoons gluten free soy sauce
  • 2 tablespoons water
  • 2 tablespoons cornstarch

instructions


  1. In a medium mixing bowl, combine salt, white pepper, cornstarch, and gluten free flour blend. Whisk to combine.
  2. Add egg, water, and oil until it reaches the consistency of pancake batter.
  3. Add the chicken to the batter, cover and refrigerate for at least 30 min.
  4. Heat oil in pan to 350 degrees.
  5. Gently add chicken and  cook for 5-6 min until lightly golden brown.  Make sure to not over fill pan.  Might have to cook chicken in batches.
  6. Remove chicken from the pan and transfer to a paper towel-lined plate.
  7. In a large pan over medium-high heat add oil and when the oil begins to simmer, add the red chili flakes, garlic and ginger. Cook for 30 seconds, stirring constantly.
  8. Add sugar and brown sugar, stir to combine. Add orange juice and allow the sugars to dissolve in the liquid, stirring constantly.
  9. Add the vinegar and gluten free soy sauce, stirring to combine.
  10. Mix cornstarch and water together to make a slurry. Slowly add mixture into orange sauce a little at a time. Continue to cook over heat until sauce has thickened.
  11. Add fried chicken and stir until completely coated in the sauce. Serve immediately.
Created using The Recipes Generator
May 30, 2018 No comments
I think popcorn is the perfect snack. I grew up eating it almost every night with my parents and the love has continued.  I love it pretty much anyway but this caramel marshmallow recipe is just perfection.  It has the perfect consistency and the sugar popcorn ratio is just perfect. I don't like caramel popcorn when it is super gloppy and there is more sugar than popcorn.  (If you do like it that way just use less popcorn.) I make big batches of this popcorn and keep it stored for when I need a sweet treat. I honestly have to set a limit on how much I can eat because I could eat all of it if I go unchecked.  It is just so addicting and it is so hard to stop.  I once brought this over to my parent's to share with them and my sister and her kids and this popcorn was devoured in about 5 minutes.  Everyone tries to get as much as they can before it's gone because it is amazing!
 The best part of this recipe is that it whips up in just minutes.  There is very little prep time and I usually have all of these ingredients in my pantry so I can just make it whenever I feel the urge.  We love to go camping and go on road trips so this is the perfect snack to make before those.  Sometimes when you travel and go on vacation it can be hard to find safe food to eat so bringing yummy snacks really helps with this.  When I go camping and everyone is making s'mores I love to break this popcorn out and enjoy it so then I don't get sad over what I can't eat.
This recipe is naturally gluten free but not dairy free.  If you are looking for dairy free, just replace the butter with margarine and it will be just as good.  Make sure to go over to my YouTube channel for more great recipes and product reviews. Also check out the video down below to see exactly how I made it.
Yield: 10 servingsAuthor: Kimberly Llewellyn

Caramel Marshmallow Popcorn

A fast and easy delicious snack that is naturally gluten free!
prep time: 5 MINScook time: 10 MINStotal time: 15 mins

ingredients:


  • 1 cup unpopped popcorn
  • 1/2 cup butter
  • 1 cup brown sugar
  • 2 Tablespoons honey
  • 1/2 teaspoon vanilla
  • 15 large marshmallows

instructions


  1. Pop popcorn until done, remove any unpopped kernels.
  2. Melt butter in a medium saucepan over low heat.  Add brown sugar, honey, vanilla and marshmallows.
  3. Turn heat to medium and stir until marshmallows are melted and mixture is smooth.
  4. Pour mixture over popcorn and stir until the popcorn is evenly coated. Store in airtight container.
Created using The Recipes Generator
May 08, 2018 No comments
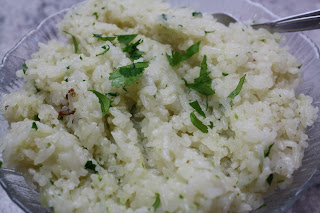
Living a gluten free lifestyle, sometimes means that we eat a lot of rice. I try to limit my rice intake but it is just so easy to make.  I like to play with rice and make it a bit different so that I'm not eating just plain rice all the time.  This lime cilantro rice is the perfect side dish and is just so easy to whip up.  It doesn't take long to make this and most everyone loves it.  
I adore cilantro, so much so that my husband started growing it for me in our garden.  I think it is just such a wonderful herb that gives so much flavor.  I also live just outside of Los Angeles so we are surrounded by amazing Mexican food that is full of cilantro.  The flavor of the lime and the cilantro make the perfect combination for this dish.  The flavors are not too strong but just add the perfect touch to this side dish.
This dish is especially good with some pulled pork on top or any meat on top.  I have made this for burrito bowls or just a side dish for tacos.  It just goes so well with so many dishes.  I also love to make this for when we have company over because it just elevates the rice and brings a punch of flavor.  It's so easy to just modify the recipe to fit how many people you are going to feed. Check out the video down below to see exactly how I made it and make sure to visit my YouTube channel for more great recipes and product reviews.
Yield: 8-10 servingsAuthor: Kimberly Llewellyn

Lime Cilantro Rice

This side dish is sure to add a pop of flavor to any meal.
prep time: 15 MINScook time: 20 MINStotal time: 35 mins

ingredients:


  • 4 tablespoons butter
  • 2 shallots, minced
  • 2 cups jasmine rice
  • grated zest of 2 limes
  • 3 stalks of cilantro, washed (the long thin part, no leaves)
  • 4 cups hot chicken stock or broth
  • 2 tablespoons fresh cilantro leaves
  • salt and pepper to taste

instructions


  1. Melt butter in medium/large saucepan. Saute the shallots until tender, 3-4 minutes.
  2. Add rice and cook until translucent and well coated with butter, just a few more minutes.
  3. Stir in half of lime zest, the cilantro stalks and the chicken stock. Cover saucepan and let simmer until the liquid is absorbed and rice is tender, about 20-25 minutes.
  4. Stir in remaining lime zest and cilantro leaves. Season to taste and serve immediately.
Created using The Recipes Generator
April 17, 2018 No comments
I love pasta, and I especially love lasagna.  I don't think anything compares with the layers of sauce, meat, pasta and lots and lots of cheese! It is really the perfect meal besides all the calories that are packed in it.  I only get around to make this delicious meal about twice a year and when I make it, I enjoy it until the last bite.  My husband has been looking forward to this blog post for sometime now and keeps bugging me to make it because it means that he gets to eat it. Now, my husband is definitely not gluten free and he LOVES this recipe.

No one will be able to tell that this is gluten free. The pasta is the only thing that really needs to be changed.  There are a lot of different kinds of gluten free lasagna pasta out there and I have pretty much tried them all.  A lot of them are the "oven ready" noodles where you don't have to cook them before hand.  While these are really convenient, they don't always work.  I have had many lasagnas come out of the oven with crunchy noodles and no one wants that. I have found that if I boil the noodles for just a couple minutes, it makes all the difference.  If I get the ones that you have to cook before hand, I just follow the package directions.
For spaghetti sauces, I just pull one out of my pantry.  I always have Prego on hand and that is what my family likes so I always use that.  If you want to get really fancy, you can always make your own and I know some people will curse me just for using bottled sauce but it's easy and I'm all about making it as easy as possible.
Dinner time is a bit hectic so when I make this, I usually make it earlier in the afternoon, before my kids come home from school.  I will just keep it in the fridge until it is time to bake. This is also great to freeze and then pop out and in the oven. You will just have to bake it a bit more until it is heated all the way through. I would leave it in the oven for about an hour before uncovering it  and then baking it another ten minutes.
I hope you enjoy this recipe and much as we do. There is a video down below that show's exactly how I make it so make sure to look for that. Also, make sure to check out my YouTube channel for more great recipes and product reviews.


print recipe

Gluten Free Lasagna
by Kimberly Llewellyn January-23-2018
Such a great and classic recipe that no one will know is gluten free!
Ingredients
  • 1 lb. lean ground beef
  • 1 onion, diced
  • 1 tablespoon garlic
  • 1 tablespoon olive oil
  • 1 jar (24 oz) traditional spaghetti sauce
  • 1/2 cup water
  • 1 container (15 oz) low fat ricotta cheese
  • 2 cups shredded Mozzarella cheese
  • 3/4 cup shredded Parmesan cheese
  • 2 eggs, beaten
  • 1 1/2 teaspoons Italian seasoning
  • salt and pepper to taste
  • 1 package gluten free lasagna noodles
Instructions
1. Preheat oven to 350 degrees. Spray a 9 x 13 x 2 - inch pan with nonstick spray.2. In a large skillet, over medium-high heat, heat oil and then cook onion and garlic. Add meat, stirring frequently, until meat is browned and onion is tender. Add 1 teaspoon and salt and pepper to meat. Drain and return to skillet. Add spaghetti sauce and water. Heat over medium heat to a simmer.3. In a large pot, bring water to a boil and then cook lasagna noodles for 2 to 3 minutes or according to package directions.4. In a medium bowl, combine ricotta cheese, 1 cup Mozzarella cheese, 1/2 cup Parmesan cheese, eggs and 1/2 teaspoon of Italian seasoning: blend well. Set aside.5. Spread 1 cup meat sauce in bottom of prepared pan. Layer 4 lasagna noodles on top of sauce. Top with half of ricotta mixture. Layer 4 lasagna noodles on top of ricotta. Spread with a scant cup of sauce. Top with remaining ricotta mixture. Layer 4 lasagna noodles on top of ricotta. Top with remaining sauce, spreading evenly. Sprinkle remaining Mozzarella and Parmesan cheese over all.6. Cover with foil that has been sprayed with nonstick spray. Bake for 45 minutes, remove foil and continue baking for 10 minutes. Allow to stand for 10 to 15 minutes before cutting into servings.
Details
Prep time: 25 mins Cook time: 55 mins Total time: 1 hour 20 mins Yield: 12 servings
January 23, 2018 2 comments
One of the hardest things that people that are forced into this diet have to go through is the realization that many of their favorite foods are now off the table. Out goes the ease of ordering off take out menus and you are left feeling like you will never enjoy those kinds of foods again.  Here is one recipe that will make you feel like your old self again.  This fried rice recipe is quick, easy, and so good.  The best part is that it is so much better for you than the take out alternative.

I usually always have onions, carrots, peas and bell peppers on hand but you can really use whatever is in your fridge. It is a great way to clean out the fridge.  If I have leftover rice from dinner the night before this is perfect to make the next day. If I don't, I just cook some rice to use.  I will throw in some meat if I have it too.  Anything is good, chicken, beef, shrimp, fish or even sausage is great in this recipe.
Make sure your soy sauce is gluten free because regular soy sauce is made from wheat but the gluten free alternative tastes exactly the same. There are a few different brands out there that make a gluten free soy sauce and I haven't found a difference in taste among them so just pick up whatever your store carries.
Sometimes this diagnosis can be hard but it gets a whole lot easier with recipes like this.  I especially love to eat this the next day. It makes the perfect lunch and will satisfy those take out cravings.  If you want to see exactly how I made this, check out the video down below. Also, make sure to check out my YouTube channel for more great recipes and product reviews.

print recipe

Gluten Free Fried Rice
by Kimberly Llewellyn January-16-2018
Delicious gluten free alternative to a favorite take out item.
Ingredients
  • 2 cups uncooked or 4 cups cooked rice
  • 1/3 cup vegetable oil
  • 1 onion, diced
  • 1 tablespoon garlic
  • 1 cup chopped carrots
  • 1 cup frozen peas
  • 1 bell pepper, any color, diced
  • 2 eggs, beaten
  • 1 tablespoon sesame oil
  • about 1/4 cup gluten free soy sauce
  • sriracha, optional
Instructions
1. Cook rice2. Pour oil in large pan or wok and heat. Add onion and garlic and cook until soft. 3. Add carrots, peas, bell peppers, cooked meat and saute until tender. 4. Add rice and mix with vegetables. Make a space in pan and pour eggs. Cook for a minute and then mix with the rest of the rice. Add soy sauce and sriracha if desired. . 5. Serve immediately and enjoy!
Details
Prep time: 10 mins Cook time: 20 mins Total time: 30 mins Yield: 10 servings
January 16, 2018 No comments
My mom has been making this chicken noodle soup for as long as I can remember.  Anytime anyone felt under the weather she would whip this up and we would all start to feel a bit better.  When I got really sick, I ended up eating a lot of this and even after I was diagnosed, I ate a lot because I needed to heal my gut.  This soup is so easy on your stomach but is packed with lots of nutrients to help heal your body.  It is the perfect food when trying to detox from gluten or for any ailment that you have.

I start with a rotisserie chicken because it is just so much easier. It cuts out the huge step on cooking a chicken.  You just want to be careful and make sure you read your labels because not all rotisserie chickens are gluten free.  Some stores do use gluten in cooking them so make sure to get a gluten free one.  I usually get mine from either Sam's Club or Costco because they sell gluten free ones.  A lot of times I will buy one and my family will eat it for dinner.  The next day I will take all the leftover meat off of it and then use the bones for soup so I get two dinners out of it.
Next. I get vegetables.  If I know that I am going to be making this soup ahead of time I will save the vegetable scraps from the week before. Any veggies that we eat I will save the tops or the parts that we don't use and then throw it into the soup.  You can switch up any veggies that you want but I suggest to always use at least celery and onions.  I have tried to make it without these and it just doesn't turn out right.  The celery and onions are a must but anything else can be replaced.  These are just the veggies that I usually use because I always have them on hand because they are our favorite. I have also been known to add a bit of salsa because it has such good flavors already packed in.  I especially like to do this when my veggie drawer isn't as full as I would like and want to add some extra flavor.
You then take the chicken bones with all the meat off that you can get, throw it in the pot and then add the veggies. Add chicken broth until it covers everything.  Make sure you get gluten free chicken broth as well because there are lots of kinds and some are not safe.  I like the Pacific brand and it is usually my go to chicken broth.
After the soup comes to a boil, let it simmer for about 2-4 hours.  I usually check it around the 2 hour mark to see how it is coming. Sometimes it is done but other times it might need longer to simmer.  Just let it cook until it tastes good to you. When it is done cooking, I strain all the chicken bones and veggies out of it and then add some carrots to the broth and let them cook until they are soft. While this is happening I will cook some gluten free noodles.  I have been known to use anything from spaghetti noodles to penne or anything in between.  Whatever I have in my pantry I use, but my kids actually like the spaghetti noodles the best. I will break them up so they aren't so long and my kids have lots of fun slurping them up.
 I usually add the noddles separately because they can get soggy if left in the broth and I am not a fan of that.  I add some noodles in the bowl, add some cut up chicken and then add the hot broth over it all to make the perfect consistency.  It always turns out great and you never have to worry about soggy noodles.

I like to always have this soup on hand whenever someone in my family needs it.  This is great if you want to freeze it so that you van have it when you need it. If you accidentally eat gluten and you are having a hard time, this is perfect. If I am really sick I will just drink the broth straight. I usually just put it in a mug and sip on it when I can't seem to eat anything else. This is another reason to keep the noodles separate so that you can freeze it and keep it for later. This really is the best soup and my whole family just loves it.  My kids get so excited when I make it and everyone just slurps it down.  Check out the video down below to see exactly how I make it and make sure to check out my YouTube channel for more great recipes and product reviews.

print recipe

Gluten Free Chicken Noodle Soup
by Marylynn Aguirre January-8-2018
This is the perfect soup for when you are ill or just a cold winter night.
Ingredients
  • 1 rotisserie chicken
  • celery
  • onions
  • carrots
  • bell peppers
  • tomatoes
  • greens (kale, swiss chard, etc.)
  • 4 cartons gluten free chicken broth
  • 1 tablespoon minced garlic
  • salt and pepper to taste
  • 1 package gluten free pasta
  • 1 1/2 cups diced carrots
Instructions
1. Take off as much meat from the rotisserie chicken that you can and add the bones to a big pot. Cut chicken meat in bite size pieces and set aside.2. Cut up vegetables and add to the pot with the chicken bones.3. Add enough chicken broth to cover bones and vegetables. Add garlic and salt and pepper. Mix everything together.4. Cook on high until soup comes to a boil. Turn down heat to low and simmer for 2-4 hours.5. When done cooking, strain out vegetables and chicken bones leaving just the chicken broth. You may need to strain the broth a couple times to make sure everything is removed. Put back on a medium heat and add carrots to broth. Cook until carrots are tender.6. While carrots are cooking, cook pasta in separate pot according to package instructions. Strain water from pasta and set aside.7. In a bowl add some gluten free pasta, cut up chicken and then pour hot broth over. Serve immediately.*This soup can be frozen for later use. Just put broth into an airtight container and store in freezer up to two weeks for best results. Do not freeze with noodles or chicken.
Details
Prep time: 20 mins Cook time: 4 hour Total time: 4 hour 20 mins Yield:
January 08, 2018 No comments
Older Posts

Gluten Free Websites

  • Gluten Free Resource Directory

About Me

About Me

My name is Kimberly and ever since my diagnosis about 12 years ago, I have been on a mission to find great gluten free products and develop amazing recipes that everyone will love.

Follow Me

Awards

Gluten Free Youtube Channels

Popular Posts

  • Gluten Free Christmas Pinwheel Cookies
    Christmas is a time for treats, treats and treats! We seem to overindulge during this holiday season and just because you are gluten free, i...
  • Gluten Free Sugar Cookies with Royal Icing
    Sugar cookies are a must in my house during Christmas.  My kids look forward all year until they get to help me make the sugar cookies and t...
  • Gluten Free Monkey Bread
    Monkey bread was something that I missed so much after going gluten free.  I looked for years to try and find a good recipe but nothing seem...

recent posts

Labels

Appetizers Baking Recipes breakfast Cakes Christmas Cookies Cooking Recipes Dinners Pie product reveiws Pumpkin Videos

1

Report Abuse

FOLLOW ME @INSTAGRAM

Created with by ThemeXpose