
Gluten Free Rainbow Lego Cake
If you follow my blog you know that I love to make my kid's birthday cakes. I have been pretty open to what I might be able to accomplish and my kids are set on testing my skills. My son turned 8 back in June and he wanted to have a bowling party complete with a bowling ball cake. My middle son turned 6 a couple weeks ago and we celebrated at Legoland so of course he wanted to have a Lego cake. I did my research to see how I would be able to make this cake. We invited family over to have cake and ice cream and we have a lot of family so I needed a really big cake. I thought it would be the best to use two cake mixes to get a big enough cake to make for the whole family. While I was thinking about how best to do this, I thought making a rainbow cake would be super fun so I needed to factor that into figuring out how this birthday cake would work.


Gluten Free Rainbow Lego Cake
ingredients:
- 2 (15 ounce) yellow gluten free cake mixes
- 1/2 cup vanilla instant pudding mix
- 1 1/2 cups milk
- 2 sticks unsalted butter, softened
- 6 large eggs
- 2 tablespoons pure vanilla extract
- 2 sticks unsalted butter, softened
- 7 cups powdered sugar, sifted
- 6 tablespoons milk, or more as needed
- 1 tablespoon pure vanilla extract
- gluten free food color in red, orange, yellow, green, blue and purple
- gluten free colored fondant, optional
- 6 gluten free chocolate sandwich cookies
- 6 straws or wooden dowels for support
instructions
- Place rack in the center of the oven and preheat oven to 350 degrees F. Lightly mist a 9x5 inch loaf pan and dust with gluten free flour. Shake out the excess of flour and set pan aside.
- Place cake mix, pudding mix, milk, butter, eggs, and vanilla in a large mixing bowl and beat with an electric mixer or stand mixer on low speed until the ingredients are just incorporated, 30 seconds. Stop the machine and scrape down the side of the bowl with a rubber spatula. Increase the mixer speed to medium and beat the batter until smooth, 1 to 1 1/2 minutes longer. The batter should look well blended.
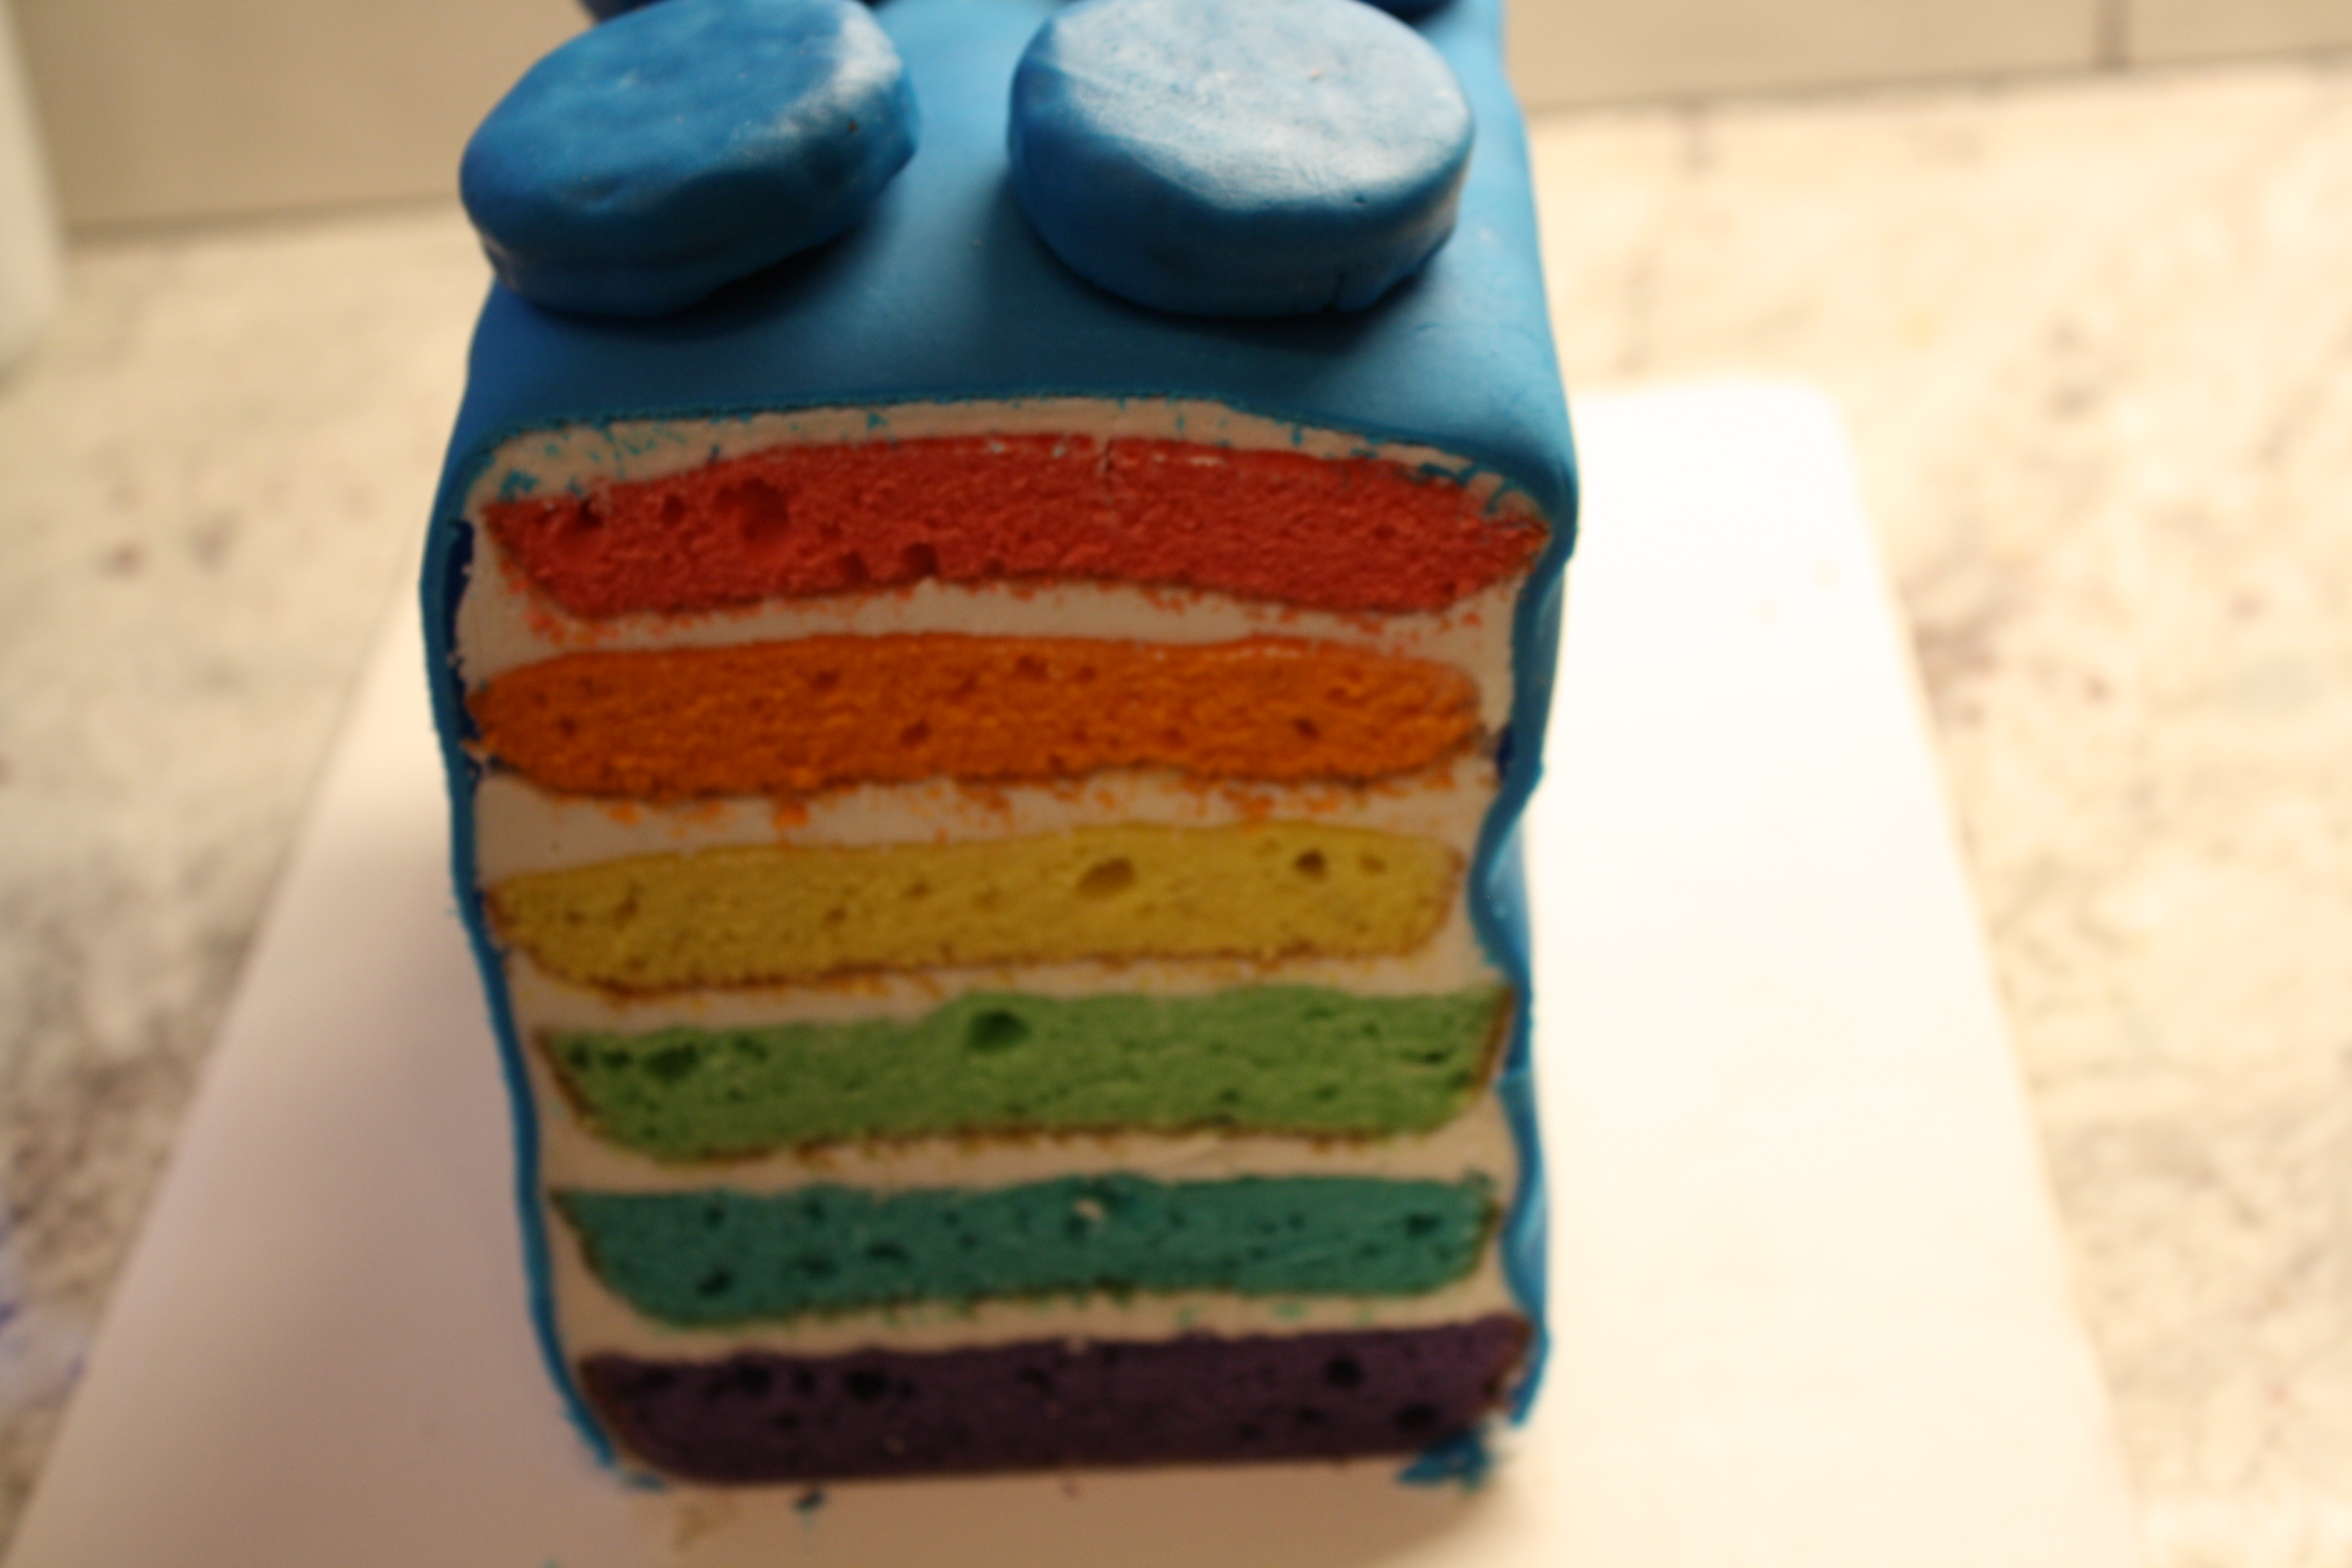
- Add 1 cup of batter to a large mixing bowl and add enough red food coloring to get the desired color. Mix until well combined. Poor batter into prepared loaf pan and bake for about 12 minutes or until the top springs back when lightly presses. Transfer loaf pan to wire rack and let cool for 5 minutes. Run a sharp knife around the edge of pan and then flip the cake out onto a wire rack to cool completely.
- Repeat the above step with the colors orange, yellow, green, blue, and purple until all six layers of cake are baked and cooled. Wrap each layer in plastic wrap and chill for 30 minutes before frosting.
- Place the butter in a large-size mixing bowl and beat and beat with an electric mixer or stand mixer on low speed until fluffy, about 30 seconds. Stop the machine and scrape down the sides of the bowl before adding the sifted powdered sugar. Add half of the powdered sugar and mix until full incorporated before adding the other half. Add milk and vanilla and beat about 1 minute until frosting is light and fluffy. Beat in up to 1 tablespoon more milk if the frosting seems to stiff.
- Transfer the purple layer, right side up to a serving plate. Spread the top with about 1/3 cup frosting before putting on the blue layer. Continue to frost each layer in the order of purple, blue, green, yellow, orange, and the red would be the final layer. After placing all the layers insert straws or wooden dowels straight down into the cake to give the cake support. Cut the remaining straw off at the top and continue to frost the top and the side of the cake until the cake is covered. Place cake in refrigerator while rolling out the fondant.
- Roll out fondant according to the package directions. Transfer rolled out fondant onto the cake and carefully smooth down over the frosted cake, making sure to cover all the sides. Cut off the excess fondant and set aside.
- Roll out excess fondant into a thin layer. Wrap fondant over the gluten free chocolate sandwich cookies and place on the cake. You might need to get a tiny piece of fondant and get it wet and put it on the bottom of the cookie to attach it to the cake.
- After cookies are placed, cake is finished. You can decorate it however you would like or just add some birthday candles for the best birthday cake ever. Slice and enjoy!


0 comments